Implement New Service

Using a new service is the fastest way to implement a feature for analyzing terrain. In this exercise, you'll learn how to implement and test a new service. The implementation will use a base service library, which will be supported by other Simdify Scripting Language function libraries.

Create A New Service

  1. Start the Layout app. (Start » Programs » Scenomics » Layout) or (Windows® key and then type 'Layout' to find the app icon.)
  2. Select File » New » Service from the main menu.

    The new service wizard appears. This allows you to specify basic information about your service.

    This is a picture of the new service wizard.
  3. Set Author to your name or your company name or whatever name you like.

    Copy Text To Clipboard

    Octopus Software, Inc.
  4. Set Workload Name to AnalyzeTerrain.

    Copy Text To Clipboard

    AnalyzeTerrain
  5. Set Description to This service opens a GEOTIFF file and generates an array texture containing the elevation values from the GEOTIFF..

    Copy Text To Clipboard

    This service opens a GEOTIFF file, performs terrain analysis, and generates an avalanche terrain analysis report for the elevation data.
  6. Click OK or hit ENTER when you are finished.

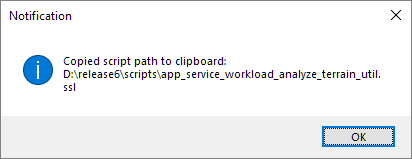
    The software displays a message box that says a script path has been copied to the clipboard.

    This is a picture of the new script notification.

Open New Service Script

  1. Start a text editor of your choice and select the option to open a file from disk.

    You'll need to use a text editor that supports multiple documents, or you'll need to start multiple text editors during this exercise.

  2. Select CTRL + V to paste the script command library file path (into the place in the dialog where you specify the file to open).
  3. Open the file.

    There will be minor differences in your script and what you see below. For example: the author will be different.

    ///////////////////////////////////////////////////////////////////////////////
    //
    // $author           Scenomics LLC
    // $description      This service opens a GEOTIFF file, performs terrain analysis, and generates an avalanche terrain analysis report for the elevation data.
    //
    // Copyright 2021 Scenomics LLC. All Rights Reserved.
    //
    ///////////////////////////////////////////////////////////////////////////////
    
    library LibAppServiceWorkloadAnalyzeTerrain;
    
    import library "app_service_assert_util.ssl";
    import library "app_service_build_util.ssl";
    import library "app_service_console_util.ssl";
    import library "app_service_main_util.ssl";
    import library "type_file_path_algorithms.ssl";
    import library "type_float32_array_util.ssl";
    import library "type_image_channel_extract_util.ssl";
    import library "type_image_format_util.ssl";
    import library "type_image_util.ssl";
    import library "type_int32_array_util.ssl";
    import library "type_render3d_util.ssl";
    import library "type_service_enumeration_util.ssl";
    import library "type_str_list_util.ssl";
    import library "app_service_workload_analyze_terrain_classes.ssl";
    
    ///////////////////////////////////////////////////////////////////////////////
    // function
    ///////////////////////////////////////////////////////////////////////////////
    
    function void GetName( Str p_oName )
    {
       p_oName.Value = "Spa.Service.AnalyzeTerrain";
    }
    
    ///////////////////////////////////////////////////////////////////////////////
    // function
    ///////////////////////////////////////////////////////////////////////////////
    
    function bool Execute( CommandPresentationModuleInfo commandInfo )
    {
       auto Str a_oName;
       GetName( a_oName );
    
       auto StrList a_slMessages;
       LibAppServiceBuild.GenerateServiceHeader(
       a_oName.Value, a_slMessages );
    
       a_slMessages.AddBlank();
       a_slMessages.Add( "Executed service: " + a_oName.Value );
    
       LibAppServiceBuild.Out( a_slMessages );
    
       return true;
    }
    

Open New Classes Script

  1. Return to the running Layout application.
  2. Examine the main menu and select File » Get Application Script Path from the listed options.

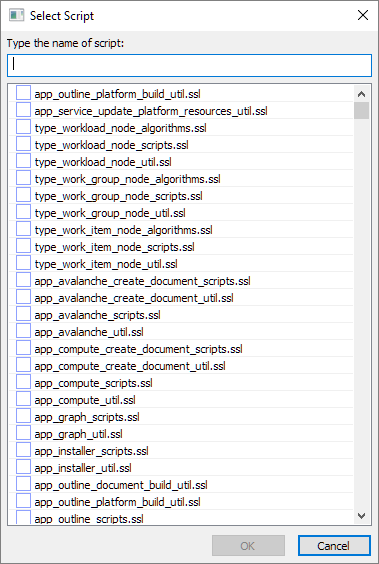
    The application displays a dialog that allows you to search for application scripts.

    This is a picture of the app script search box.
  3. Type app_service_workload_analyze_terrain_classes.ssl in the text entry.

    Copy Text To Clipboard

    app_service_workload_analyze_terrain_classes.ssl

    The script entry appears in the dialog.

  4. Left click the entry named app_service_workload_analyze_terrain_classes.ssl and click OK or hit ENTER when you are finished.

    The application copies the script path to the Windows® clipboard.

  5. Return to the running text editor and select the option to open a file from disk.
  6. Select CTRL + V to paste the script command library file path (into the place in the dialog where you specify the file to open).
  7. Open the file.

    ///////////////////////////////////////////////////////////////////////////////
    //
    // $author           Scenomics LLC
    // $description      This script contains class declarations.
    //
    // Copyright 2021 Scenomics LLC. All Rights Reserved.
    //
    ///////////////////////////////////////////////////////////////////////////////
    
    import library "app_service_assert_util.ssl";
    import library "app_service_console_util.ssl";
    

Implement Class <BuildInputs>

  1. Go to the text editor and find the script app_service_workload_analyze_terrain_classes.ssl.
  2. Insert the following class declaration into the document, directly below the import statements.

    Copy Text To Clipboard

    ///////////////////////////////////////////////////////////////////////////////
    // class
    ///////////////////////////////////////////////////////////////////////////////
    
    class BuildInputs
    {
       Model3D m_oModel;
       Render3D m_oDevice;
       RenderInfo m_oRenderInfo;
       int m_eMinGlslVersion;
    
       FileNode m_oData;
       string m_sBuildFolder;
    
       StrList m_slMessages;
    
       auto FilePath m_oModelPath;
       auto FilePath m_oSourcePath;
    
       auto Int32Vector m_oLens;
       int m_iArraySlices;
       int m_iMaxBatchSize;
    
       auto GdalImageInfo m_oGdalImageInfo;
       auto GdalDataSet m_oGdalDataset;
       auto Int32Vector m_viDstRange;
       auto Int32Vector m_viMapInfo;
    
       int m_nScaleFactor;
       double m_dSpacingX;
       double m_dSpacingY;
       double m_dRangeX;
       double m_dRangeY;
       double m_dChunkRangeX;
       double m_dChunkRangeY;
    
       auto Float32Array m_afMinMaxElevation;
       auto Float32Array m_afMinMaxNormals;
    
       auto FilePath m_oArraysPath;
       auto FilePath m_oMapsPath;
       auto FilePath m_oAnalysisPath;
       auto FilePath m_oImagesPath;
    
       string m_sElevationMapFilePath;
       string m_sAspectMapFilePath;
       string m_sSlopeMapFilePath;
       string m_sOpennessMapFilePath;
    };
    

    This class has a variety of data members that are used to store data created during service execution. Note that there is a mix of plain old data such as ints and doubles, and objects declared with and without auto. The first important thing to know is that all object data members are pointers, whether they are declared with auto or not. For a C++ programmer, this means that the data member Model3D m_oModel; is equivalent to Model3D * m_oModel = nullptr;. The declaration auto GdalImageInfo m_oGdalImageInfo; is equivalent to the C++ GdalImageInfo m_oGdalImageInfo;, where you would expect m_oGdalImageInfo to be a live object you can use.

    You cannot initialize class members in the class itself. You must first instantiate the class and then you can initialize data members as needed. By default, class members that are plain old data will be zero initialized or initialized to empty, object class members declared without auto will be nullptr initialized, and object class members declared with auto will be initialized to the constructor defaults implemented by the underlying C++ code.

    This can seem limiting, but in practice, it works really well. It's worth mentioning that you can use Simdify Scripting Language functions to initialize objects, and if you want to have a custom 'constructor', you could write that function in this library.

    Like in C++, when an instance of a class goes out of scope, the destructors of its data members are executed. This means you can use RAII techniques when you write Simdify Scripting Language code, which is very convenient.

  3. Save changes to the script.

Implement Class <BuildOutputs>

  1. Go to the text editor and find the script app_service_workload_analyze_terrain_classes.ssl.
  2. Find the class named BuildInputs and insert the following class declaration immediately below it.

    Copy Text To Clipboard

    ///////////////////////////////////////////////////////////////////////////////
    // class
    ///////////////////////////////////////////////////////////////////////////////
    
    class BuildOutputs
    {
       auto TypeBuffer m_apArrayImages;
       auto TypeBuffer m_apMapImages;
    
       Image m_oAngleTiles;
       Image m_oSurfaceTiles;
       Image m_oSumTiles;
    
       auto TypeBuffer m_apElevationImages;
       auto StrList m_slElevationPaths;
       auto TypeBuffer m_apSlopeImages;
       auto StrList m_slSlopePaths;
       auto TypeBuffer m_apOpenImages;
       auto StrList m_slOpenPaths;
       auto TypeBuffer m_apAspectImages;
       auto StrList m_slAspectPaths;
       auto TypeBuffer m_apAreaImages;
       auto StrList m_slAreaPaths;
       auto TypeBuffer m_apAreaImagesFloat;
       auto StrList m_slAreaPathsFloat;
       auto TypeBuffer m_apSumImages;
       auto StrList m_slSumPaths;
    
       auto FilePath m_oReportPath;
    };
    

    We'll use an object of type <BuildOutputs> to manage the outputs generated during service execution. We'll store collections of <Image> objects in the <TypeBuffer> data members, and we'll store collections of file paths in the <StrList> objects. The <TypeBuffer> objects will own the <Image> objects, which means the <Image> objects will automatically be destroyed when the instance of <BuildOutputs> goes out of scope at the end of the service execution command.

  3. Save changes to the script.

Test Code Changes

  1. Return to the running Layout app.
  2. Select Desktop » Refresh Scripts from the main menu. ( ALT + D + R )

    If there are any script compiler errors, undo your changes in the text editor, go back to the previous step, and follow the instructions again. Here is an example of what error messages might look like:

    Start loading scripts
    D:\release6\scripts\app_shell_util.ssl(1770) : error: newline in constant
    Done loading scripts; 10 loaded in 1.29 ms; avg 0.09
    
  3. Select File » Run Service... from the main menu.

    The software displays the service selection dialog:

    This is a picture of the service selection dialog.
  4. Double click the entry named Spa.Service.AnalyzeTerrain.
  5. The service runs and then displays the build log in the output window.

    --- <Executing Service 'Spa.Service.AnalyzeTerrain'> ---
    
    Executed service: Spa.Service.AnalyzeTerrain
    

    The service runs correctly. It doesn't do anything, but we'll start the implementation next.