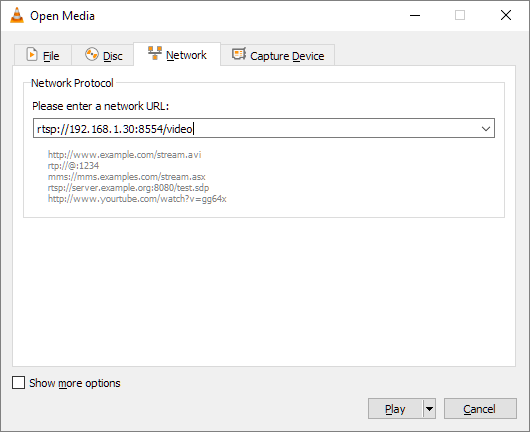

VLC displays the following dialog:

For example: rtsp://192.168.1.30:8554/video
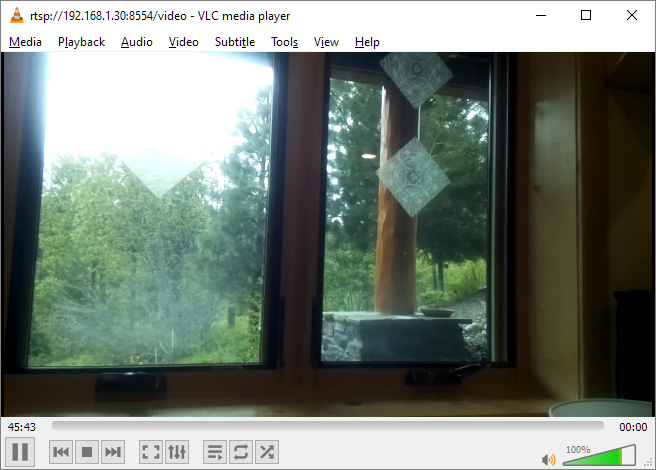
In a few moments the Raspberry Pi® 3B+ video (delayed by a few seconds) will appear within VLC.

You need the following Simdify® modules to complete all exercises involving the Raspberry Pi® 3B+: Simdify® Free Edition, Simdify® Video Module, Simdify® Export Module
If you haven’t already set up your Raspberry Pi® 3B+ Camera please refer to the following link for reference information on this:
If you know how to access the Raspberry Pi® 3B; terminal ( via Tera Term for Windows® or similar ), and if you have the raspivid utility installed, then you can start a video stream by running the following command.
raspivid -o - -e -n -w 1280 -h 720 -fps 30 -g 30 -ih -pf high -md 4 -k -b 2000000 | cvlc -A-vvv -v stream:///dev/stdin --sout '#rtp{sdp=rtsp://:8554/video}' :demux=h264
Note that you can set the resolution and frames-per-second of the video stream using the -w, -h, and -fps parameters respectively.
The RTSP address of the video stream is then as follows:
rtsp://<RASP_PI_IP_ADDRESS>:8554/video, where <RASP_PI_IP_ADDRESS> is the IP address of your Raspberry Pi® 3B+ device. The IP address is also shown or specified during the connection process or on top of the terminal window.
For example: rtsp://192.168.1.30:8554/video
Use VLC to verify that your Raspberry Pi® 3B+ is streaming video from its camera.


VLC displays the following dialog:

For example: rtsp://192.168.1.30:8554/video
In a few moments the Raspberry Pi® 3B+ video (delayed by a few seconds) will appear within VLC.
