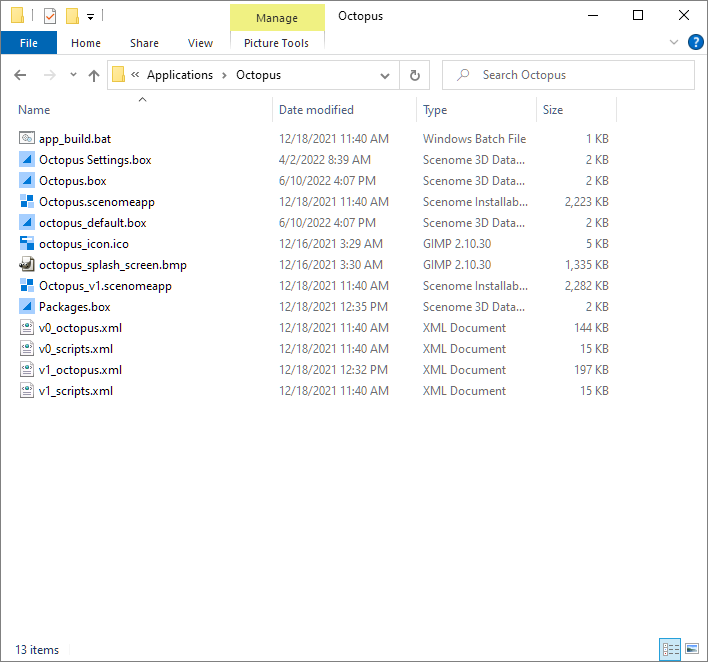
NOTE: This exercise assumes you have completed the previous exercise.
In this exercise, you'll learn how to create a custom Scenome application named Octopus.
The application displays a splash screen and then the application desktop appears. The main menu is composed of three items that contain commands relevant to the current context (which is an empty document). The interface changes when you create a new file or load a file from disk.
The application displays a dialog that allows you to search for application scripts.
app_service_dictionary_util.ssl
The script entry appears in the dialog.
The application copies the path to this script to the Windows® clipboard.
We don't recommend using Window® Notepad for text editing. Although it will work, it doesn't support very many levels of undo. For this reason, we recommend Notepad++ at minimum. Sublime Text®, Visual Studio®, or Visual Studio Code® are far superior. You can mark Scenome Scripting Language .SSL files as C++ for great syntax highlighting too.
The script appears in the text editor. We're only showing part of the script below.
///////////////////////////////////////////////////////////////////////////////
//
// $author Scenomics LLC
// $description Implements functions that generate data dictionaries.
//
// Copyright 2004-2021 Scenomics LLC. All Rights Reserved.
//
///////////////////////////////////////////////////////////////////////////////
library LibDict;
import library "app_service_assert_util.ssl";
import library "app_service_main_util.ssl";
//import library "type_str_list_util.ssl";
import library "type_service_enumeration_util.ssl";
////////////////////////////////////////////////////////////////////////////
// function
////////////////////////////////////////////////////////////////////////////
function int GetNodeLinkDataCaptureTypes( TypeInfoArray p_aoValues )
{
p_aoValues.Add( NodeDataCaptureFilter );
return p_aoValues.GetCount();
}
////////////////////////////////////////////////////////////////////////////
// function
////////////////////////////////////////////////////////////////////////////
function int GetVariableNodeDataCaptureTypes( TypeInfoArray p_aoValues )
{
p_aoValues.Add( VariableNodeDataCaptureNode );
return p_aoValues.GetCount();
}
...
GetDatabaseClasses
Note that this is one of three functions that are used to map shell classes such as v0_shader or v1_shader to specific application folders and .scenomeapp files. These shell-to-class mappings are used by Scenome.exe to load the correct UI shell when files are opened.
Each of these three functions populates a <StrList> object with strings. Before our modification, each function adds the same number of strings to each <StrList>, and after our modification each functions add two more strings to each <StrList>. These functions must always populate the <StrList> with the same number of strings.
There are two new lines at the end of the function body that add entries for v0_octopus and v1_octopus.
////////////////////////////////////////////////////////////////////////////
// function
////////////////////////////////////////////////////////////////////////////
function int GetDatabaseClasses( StrList p_slValues )
{
// Alphabetical order. Must match count of GetApplicationFolders().
p_slValues.Add( "v0_avalanche" );
p_slValues.Add( "v1_avalanche" );
p_slValues.Add( "v0_compute" );
p_slValues.Add( "v1_compute" );
p_slValues.Add( "v0_graph" );
p_slValues.Add( "v0_help" );
p_slValues.Add( "v1_help" );
p_slValues.Add( "v0_image" );
p_slValues.Add( "v1_image" );
p_slValues.Add( "v0_installer" );
p_slValues.Add( "v1_installer" );
p_slValues.Add( "v0_material" );
p_slValues.Add( "v1_material" );
p_slValues.Add( "v0_outline" );
p_slValues.Add( "v1_outline" );
p_slValues.Add( "v0_render" );
p_slValues.Add( "v1_render" );
p_slValues.Add( "v0_scene" );
p_slValues.Add( "v1_scene" );
p_slValues.Add( "v0_shader" );
p_slValues.Add( "v1_shader" );
p_slValues.Add( "v0_shell" );
p_slValues.Add( "v1_shell" );
p_slValues.Add( "v0_terrain" );
p_slValues.Add( "v1_terrain" );
p_slValues.Add( "v0_octopus" );
p_slValues.Add( "v1_octopus" );
return p_slValues.GetCount();
}
GetApplicationFolders
Note that this is one of three functions that are used to map shell classes such as v0_shader or v1_shader to specific application folders and .scenomeapp files.
There are two new lines at the end of the function body that add entries for the Octopus app folder we'll create.
////////////////////////////////////////////////////////////////////////////
// function
////////////////////////////////////////////////////////////////////////////
function int GetApplicationFolders( StrList p_slValues )
{
// Alphabetical order. Must match count of GetDatabaseClasses().
p_slValues.Add( "Avalanche" );
p_slValues.Add( "Compute" );
p_slValues.Add( "Graph" );
p_slValues.Add( "Help");
p_slValues.Add( "Image" );
p_slValues.Add( "Installer" );
p_slValues.Add( "Material" );
p_slValues.Add( "Outline" );
p_slValues.Add( "Render" );
p_slValues.Add( "Scene" );
p_slValues.Add( "Shader" );
p_slValues.Add( "Shell" );
p_slValues.Add( "Terrain" );
p_slValues.Add( "Octopus" );
return p_slValues.GetCount();
}
GetApplicationNames
Note that this is one of three functions that are used to map shell classes such as v0_shader or v1_shader to specific application folders and .scenomeapp files.
There are two new lines at the end of the function body that add entries for the .scenomeapp app shell containers we'll create.
////////////////////////////////////////////////////////////////////////////
// function
////////////////////////////////////////////////////////////////////////////
function int GetApplicationNames( StrList p_slValues )
{
// Alphabetical order. Must match count of GetDatabaseClasses().
p_slValues.Add( "Avalanche.scenomeapp" );
p_slValues.Add( "Avalanche_v1.scenomeapp" );
p_slValues.Add( "Compute.scenomeapp" );
p_slValues.Add( "Compute_v1.scenomeapp" );
p_slValues.Add( "Graph.scenomeapp" );
p_slValues.Add( "Help.scenomeapp" );
p_slValues.Add( "Help_v1.scenomeapp" );
p_slValues.Add( "Image.scenomeapp" );
p_slValues.Add( "Image_v1.scenomeapp" );
p_slValues.Add( "Installer.scenomeapp" );
p_slValues.Add( "Installer_v1.scenomeapp" );
p_slValues.Add( "Material.scenomeapp" );
p_slValues.Add( "Material_v1.scenomeapp" );
p_slValues.Add( "Outline.scenomeapp" );
p_slValues.Add( "Outline_v1.scenomeapp" );
p_slValues.Add( "Render.scenomeapp" );
p_slValues.Add( "Render_v1.scenomeapp" );
p_slValues.Add( "Scene.scenomeapp" );
p_slValues.Add( "Scene_v1.scenomeapp" );
p_slValues.Add( "Shader.scenomeapp" );
p_slValues.Add( "Shader_v1.scenomeapp" );
p_slValues.Add( "Shell.scenomeapp" );
p_slValues.Add( "Shell_v1.scenomeapp" );
p_slValues.Add( "Terrain.scenomeapp" );
p_slValues.Add( "Terrain_v1.scenomeapp" );
p_slValues.Add( "Octopus.scenomeapp" );
p_slValues.Add( "Octopus_v1.scenomeapp" );
return p_slValues.GetCount();
}
We've now successfully registered the new application shell classes, folders, and shell containers. While we could store application registration in configuration files on disk, we don't create applications very often. For that reason, it's easier to use code rather than configuration files.
The application displays script compiler messages in the output window:
Start loading scripts
Done loading scripts; 153 loaded in 13.29 ms; avg 0.09
If there are any script compiler errors, go back to the previous exercise and follow the instructions again. Here is an example of what error messages might look like:
Start loading scripts
D:\release6\scripts\app_shell_util.ssl(1770) : syntax error: missing ')' before 'e'
Done loading scripts; 153 loaded in 1.02 ms; avg 0.01
The software displays a wizard that allows you to specify the parameters of your new application. You specify a small amount of initial information and the Shell app does the rest of the work involved in scaffolding your application.
Octopus Software, Inc.
Jane Snow
John Snow
Octopus
The name must be Octopus, including the capital O. Remember, above, we registered the term Octopus for the app name, the app containing folder, and the app shell containers.
Scenome-Package-App-Octopus
Feel free to use your own package name if you have a different convention.
The application creates a new shell document and the main menu options change. You can see the hierarchy on the left, the empty worksheet in the middle, and the property sheet on the right.
There are messages in the output window. Your file paths will specify a different directory, but the file names themselves will be the same and you will see the same number of files.
--- <Executing Command 'AppShellCreateDocument'> ---
Creating app shell documents:
D:\Release6\Content\Applications\Octopus\app_build.bat
D:\Release6\Content\Applications\Octopus\Packages.box
D:\Release6\Content\Applications\Octopus\Octopus Settings.box
D:\Release6\Content\Applications\Octopus\Octopus.box
D:\Release6\Content\Applications\Octopus\Octopus.scenomeapp
D:\Release6\Content\Applications\Octopus\octopus_default.box
D:\Release6\Content\Applications\Octopus\octopus_icon.ico
D:\Release6\Content\Applications\Octopus\octopus_splash_screen.bmp
D:\Release6\Content\Applications\Octopus\Octopus_v1.scenomeapp
D:\Release6\Content\Applications\Octopus\v0_scripts.xml
D:\Release6\Content\Applications\Octopus\v0_octopus.xml
D:\Release6\Content\Applications\Octopus\v1_scripts.xml
D:\Release6\Content\Applications\Octopus\v1_octopus.xml
Creating app script documents:
D:\release6\scripts\app_octopus_create_document_scripts.ssl
D:\release6\scripts\app_octopus_create_document_util.ssl
D:\release6\scripts\app_octopus_scripts.ssl
D:\release6\scripts\app_octopus_util.ssl
New shell successfully created!
Let's quickly review the files that were created.
Table 1.1. New Documents
Document | Description |
---|---|
app_build.bat | This contains a batch file for external-app-package.exe, which is a stand-alone executable that packages a variety of resources such as a splash screen, application icons, and application shell layout files into a file such as Octopus.scenomeapp. You can open this file with a text editor, but you don't have to edit it yourself. |
Packages.box | Stores a basic list of packages associated with an application. This allows code to know what packages are installed. You can open this file with the Outline app. |
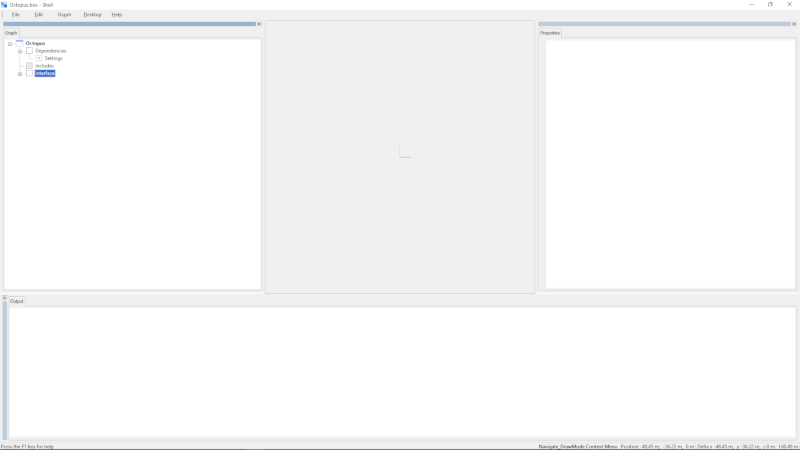
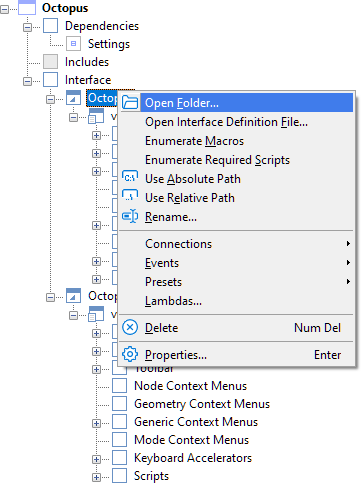
Octopus.box | Contains the Octopus app shell layout, which contains all the interface elements used by the Octopus application. This document is used to build the resources, such as .XML files, that describe the application's user interface. Once resources are built, the resources are packaged into a complete application such as Octopus.scenomeapp by the external-app-package.exe utility. You can open this file with the Shell app. |
Octopus.scenomeapp | Contains an application definition, which includes splash screen, application icons, user interface layout descriptions, and keyboard accelerator bindings. All .scenomeapp files are generated by external-app-package.exe. This is the application that is started when you start the Octopus app from the start menu. You can open this file with with a text editor, but you don't have to edit or manage it yourself. |
octopus_default.box | This contains the default document that the user sees when they start the Octopus app. It's important that this document contains as little content as possible. It definitely should not contain any content that requires file path resolution because all default documents are unsaved when you start a Scenome application, and there is no way to resovle any relative file paths. |
octopus.ico | Contains the Octopus app icons used to represent the Octopus app in the Windows® user interface. There are two icons contained in this file: a 32×32 pixel version and 16×16 pixel version. These icons appear when you use ALT+TAB to switch between applications, and in the upper left corner of the application window. These icons are not used to show which files .BOX are used by the Octopus application. All .BOX files used the standard Scenome .BOX icon, and all .BOX files can be opened in any Scenome application. You can edit these files in programs such as Microsoft® Visual Studio or GIMP®. Please note that these files must be saved as 24-bit. |
octopus_splash.bmp | Contains the Octopus app splash screen. This is the graphic that appears when the Octopus app starts. You can edit this in program such as Adobe® PhotoShop or GIMP®. Please note that this file must be saved as 24-bit Windows® .BMP file with no alpha channel. |
Octopus_v1.scenomeapp | Contains an application definition, which includes splash screen, application icons, user interface layout descriptions, and keyboard accelerator bindings. All .scenomeapp files are generated by external-app-package.exe. This is the application that is started when you double click a .BOX file that specifies the v1 shell in the document root node properties. In addition, when you have Octopus.scenomeapp running, and you open a file, the application switches to use this shell. You can open this file with with a text editor, but you don't have to edit or manage it yourself. |
v0_scripts.xml | The Octopus app has two shells, referred to as v0_octopus and v1_octopus. The v0_octopus shell is stored in Octopus.scenomeapp, and the v1_shell is stored in Octopus_v1.scenomeapp. This is the list of Scenome Scripting Language script files that must be loaded and compiled when Octopus.scenomeapp starts. You can open this file with with a text editor, but you don't have to edit or manage it yourself. |
v0_octopus.xml | This contains the interface layout used by Octopus.scenomeapp. It contains an XML description of the user interface, including all menus, context menus, toolbars, dockbars, and keyboard accelerators. You can open this file with with a text editor, but you don't have to edit or manage it yourself. |
v1_scripts.xml | The Octopus app has two shells, referred to as v0_octopus and v1_octopus. The v0_octopus shell is stored in Octopus.scenomeapp, and the v1_shell is stored in Octopus_v1.scenomeapp. This is the list of Scenome Scripting Language script files that must be loaded and compiled when Octopus_v1.scenomeapp starts. You can open this file with with a text editor, but you don't have to edit or manage it yourself. |
v1_octopus.xml | This contains the interface layout used by Octopus_v1.scenomeapp. It contains an XML description of the user interface, including all menus, context menus, toolbars, dockbars, and keyboard accelerators. You can open this file with with a text editor, but you don't have to edit or manage it yourself. |
app_octopus_create_document_scripts.ssl | This is a script macro library that contains a Scenome command macro that will run when the user creates a new document. |
app_octopus_create_document_util.ssl | This is a script function library that contains functions that are used by Scenome command macros in app_octopus_create_document_scripts.ssl. |
app_octopus_scripts.ssl | This is a script macro library that contains a Scenome command macro that builds an Octopus app file when the user selects Graph » Build All from the main menu in the Octopus app. This will also contain other Scenome command macros used only by the Octopus application. |
app_octopus_util.ssl | This is a script function library that contains functions that are used by the Scenome command macros in app_octopus_scripts.ssl. |
We'll implement initial features in the four app script documents described above, but first let's take a look at the document itself.
The <ApplicationConfigNode> named Interface contains two <AppScaffoldNode> objects named Octopus that define the UI shells used by the application. Each shell is indicated by v0 and v1. In this case the application has two primary states: there is a simple UI for when the application starts, but a document is not open (v0), and a more complex UI with more options for when a document is open (v1).
For now we won't go into the shell layouts in too much detail. Generally you won't have to make many changes to this document until you need to add menu options or change command menus.
The software opens the folder that contains the application shell resources.
Right click here to download the new application splash screen.
Say Yes when Windows asks you if you wish to overwrite the existing file.
The software builds the application and displays build information in the output window. You'll temporarily see a Windows Command Shell appear when the External-AppPackage.exe runs.
--- <Building Project 'D:\Release6\Content\Applications\Octopus\Octopus.box'> ---
Performing manual lookup: D:\release6\scripts\app_octopus_create_document_scripts.ssl
Performing manual lookup: D:\release6\scripts\app_octopus_scripts.ssl
Unable to find command by GUID for '/Interface/Octopus/v0/Main Menu/Menu Bar/ &File /CreateOctopusDocument' in document: D:\Release6\Content\Applications\Octopus\Octopus.box
It's possible that this command has not been added to the command dictionary, and that a manual lookup was already performed.
Unable to find command by GUID for '/Interface/Octopus/v0/Main Menu/Menu Bar/ &File /&Open...' in document: D:\Release6\Content\Applications\Octopus\Octopus.box
It's possible that this command has not been added to the command dictionary, and that a manual lookup was already performed.
Successfully refreshed 633 <ItemElementNode> objects.
Wrote the interface definition to disk at the following location: D:\release6\content\applications\octopus\v0_octopus.xml
Performing manual lookup: D:\release6\scripts\app_octopus_scripts.ssl
Unable to find command by GUID for '/Interface/Octopus/v1/Main Menu/Menu Bar/ Gr&aph /&Build All' in document: D:\Release6\Content\Applications\Octopus\Octopus.box
It's possible that this command has not been added to the command dictionary, and that a manual lookup was already performed.
Successfully refreshed 4411 <ItemElementNode> objects.
Wrote the interface definition to disk at the following location: D:\release6\content\applications\octopus\v1_octopus.xml
Saved the interface definition and wrote build script entry for the following application: 'Octopus'
Ran the build script at the following location: D:\Release6\Content\Applications\Octopus\app_build.bat ( via shell execute ).
The software displays the splash screen and the application starts. Now you're running in true Octopus style!
We successfully created a new application shell. It has a custom splash screen and icons, along with a basic main menu and commands.
The command displays a message at the bottom of the output window.
Executed document create command.
The new application shell is complete. The create command doesn't do anything useful yet, but it does work correctly. In the next exercise, we'll modify the create command to create a new document.
This exercise is complete. Please proceed to the next exercise.