Implement Document Create Command

NOTE: This exercise assumes you have completed the previous exercise.

In this exercise you'll learn to implement a Scenome application command that creates a new document with the Octopus app. At the end of this exercise, you'll have a command that can create a new GPU compute project.

Implement Function 'GetNewDocumentString'

  1. Go to the text editor and find the script app_octopus_create_document_util.ssl.
  2. Find the function named GetFilterInfo Copy.

    ///////////////////////////////////////////////////////////////////////////////
    // function
    ///////////////////////////////////////////////////////////////////////////////
    
    function string GetFilterInfo()
    {
    return "Octopus Box Files (*.box)|*.box|All Files (*.*)|*.*||";
    }
    

    We're going to implement a new function to store UI strings.

  3. Insert the following function immediately above GetFilterInfo.

    Copy Text To Clipboard

    ///////////////////////////////////////////////////////////////////////////////
    // function
    ///////////////////////////////////////////////////////////////////////////////
    
    function string GetNewDocumentString()
    {
    return "&Workload...";
    }
    
  4. Save the script in the text editor.

Modify Function 'PopulateMenu'

  1. Go to the text editor and find the script app_octopus_create_document_util.ssl.
  2. Find the function named PopulateMenu Copy.

    We're going to change the name of the menu item in the create command popup menu.

    ///////////////////////////////////////////////////////////////////////////////
    // function
    ///////////////////////////////////////////////////////////////////////////////
    
    function int PopulateMenu( StrList p_slTitles )
    {
    p_slTitles.Add( "&New Document" );
    
    return p_slTitles.GetCount();
    }
  3. Change &New Document to GetNewDocumentString() and save the file.

    Copy Text To Clipboard

    ///////////////////////////////////////////////////////////////////////////////
    // function
    ///////////////////////////////////////////////////////////////////////////////
    
    function int PopulateMenu( StrList p_slTitles )
    {
    p_slTitles.Add( GetNewDocumentString() );
    
    return p_slTitles.GetCount();
    }
  4. Save the script in the text editor.

Modify Function 'GetIconImages'

  1. Find the function named GetIconImages Copy.

    ///////////////////////////////////////////////////////////////////////////////
    // function
    ///////////////////////////////////////////////////////////////////////////////
    
    function void GetIconImages( TypeInfoArray p_aoTypes, TypeArray p_aoItemImages )
    {
    auto FilePath a_oIconPath = new FilePath(
    LibAppServiceMain.GetIconsPath() );
    a_oIconPath.AppendPath( "root_icon.bmp" );
    
    for( int i = 0; i < p_aoTypes.GetCount(); ++i )
    {
    Image a_oImage = new Image;
    a_oImage.OpenFile( a_oIconPath.GetPath() );
    p_aoItemImages.Add( a_oImage );
    }
    }

    We're going to change the name of the icon presented on the left side of popup menu items.

  2. Change root_icon.bmp to create_new_workload_command.bmp and save the file.

    Copy Text To Clipboard

    ///////////////////////////////////////////////////////////////////////////////
    // function
    ///////////////////////////////////////////////////////////////////////////////
    
    function void GetIconImages( TypeInfoArray p_aoTypes, TypeArray p_aoItemImages )
    {
    auto FilePath a_oIconPath = new FilePath(
    LibAppServiceMain.GetIconsPath() );
    a_oIconPath.AppendPath( "create_new_workload_command.bmp" );
    
    for( int i = 0; i < p_aoTypes.GetCount(); ++i )
    {
    Image a_oImage = new Image;
    a_oImage.OpenFile( a_oIconPath.GetPath() );
    p_aoItemImages.Add( a_oImage );
    }
    }
  3. Save the script in the text editor.

Implement Function 'Execute'

  1. Go to the text editor and find the script app_octopus_create_document_util.ssl.
  2. Find the function named GetIconImages. Copy.

    ///////////////////////////////////////////////////////////////////////////////
    // function
    ///////////////////////////////////////////////////////////////////////////////
    
    function void GetIconImages( TypeInfoArray p_aoTypes, TypeArray p_aoItemImages )
    {
    auto FilePath a_oIconPath = new FilePath(
    LibAppServiceMain.GetIconsPath() );
    a_oIconPath.AppendPath( "create_new_workload_command.bmp" );
    
    for( int i = 0; i < p_aoTypes.GetCount(); ++i )
    {
    Image a_oImage = new Image;
    a_oImage.OpenFile( a_oIconPath.GetPath() );
    p_aoItemImages.Add( a_oImage );
    }
    }
    

    We're going to implement a new function that creates the new document.

  3. Insert the following function immediately below GetIconImages.

    Copy Text To Clipboard

    ///////////////////////////////////////////////////////////////////////////////
    // function
    ///////////////////////////////////////////////////////////////////////////////
    
    function bool Execute( CommandExecutionEvent event )
    {
    Console.Out( "Executed document create command." );
    
    return true;
    }
    
  4. Save the script in the text editor.

Test Code Changes

  1. Return to the running Octopus app.
  2. Select Desktop » Refresh Scripts from the main menu. ( ALT + D + R )

    The application displays script compiler messages in the output window:

    Start loading scripts
    Done loading scripts; 10 loaded in 1.29 ms; avg 0.09
    

    If there are any script compiler errors, undo your changes in the text editor, go back to the previous step, and follow the instructions again. Here is an example of what error messages might look like:

    Start loading scripts
    D:\release6\scripts\app_shell_util.ssl(1770) : error: newline in constant
    Done loading scripts; 10 loaded in 1.29 ms; avg 0.09
    
  3. Select File » New from the main menu.

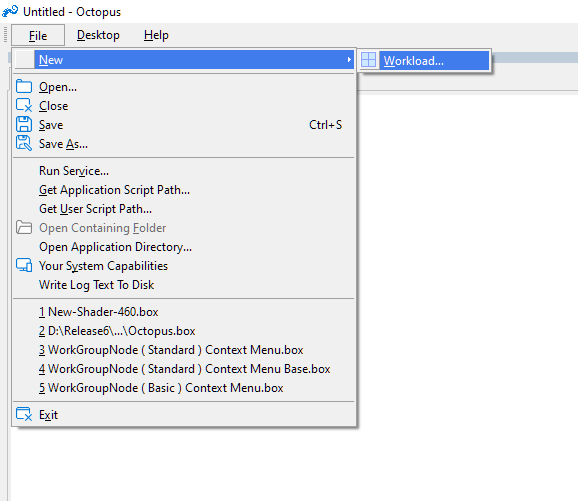
    A popup menu appears. You should see the following:

    This is a picture of the new popup menu.

    The command uses the new name and icon, so the user interface work is complete. Now it's time to make the command do some work so that we can work in true octopus style.

  4. Save the script in the text editor.

Modify Function 'CreateOctopusDocument' — Adding Function Call Site

  1. Find the script app_octopus_create_document_scripts.ssl in the text editor.
  2. Find the function named CreateOctopusDocument Copy.

    ///////////////////////////////////////////////////////////////////////////////
    // function
    ///////////////////////////////////////////////////////////////////////////////
    
    function void CreateOctopusDocument(
    
    ApplicationEventSource sender,
    CommandExecutionEvent event,
    string p_sMenuTitle,
    int p_nIndex
    
    )
    {
    Console.Out( "Executed document create command." );
    }
    

    At present you can see the command body prints a message to the output window and then completes. This lets us know if the command is working, but it's a long way from doing anything useful. We're going to do a fairly complicated implementation, but we're going to take it step-by-step, and we'll discuss aspects of the implementation and the code as we go.

  3. Replace the entire CreateOctopusDocument function with following code:

    Copy Text To Clipboard

    ///////////////////////////////////////////////////////////////////////////////
    // function
    ///////////////////////////////////////////////////////////////////////////////
    
    function void CreateOctopusDocument(
    
    ApplicationEventSource sender,
    CommandExecutionEvent event,
    string p_sMenuTitle,
    int p_nIndex
    
    )
    {
    if( p_sMenuTitle == LibOctopusCreateDocument.GetNewDocumentString() )
    {
    LibOctopusCreateDocument.Execute( event );
    }
    }

    This code checks if the menu name string matches the workload string (&Workload...), and calls a function that creates the new document for us. This implementation allows us to have multiple menu items that create different types of documents. For now though, we'll only have one type of document. This strategy also allows us to implement the code for document creation in separate functions, which promotes separation-of-concerns.

  4. Save the script in the text editor.

Modify Function 'CreateOctopusDocument_OnUpdate' — Update UI Hint Text

  1. Find the script app_octopus_create_document_scripts.ssl in the text editor.
  2. Find the function named CreateOctopusDocument_OnUpdate. Copy.

    ///////////////////////////////////////////////////////////////////////////////
    // function
    ///////////////////////////////////////////////////////////////////////////////
    
    function void CreateOctopusDocument_OnUpdate(
    
    ApplicationEventSource sender,
    CommandUpdateEvent event,
    string p_sMenuTitle,
    int p_nIndex
    
    )
    {
    event.Info.Status.SetHint( "Creates a new..." );
    }

    This sets the hint text when the user moves the mouse over the cursor.

  3. Replace the entire CreateOctopusDocument_OnUpdate function with following code:

    Copy Text To Clipboard

    ///////////////////////////////////////////////////////////////////////////////
    // function
    ///////////////////////////////////////////////////////////////////////////////
    
    function void CreateOctopusDocument_OnUpdate(
    
    ApplicationEventSource sender,
    CommandUpdateEvent event,
    string p_sMenuTitle,
    int p_nIndex
    
    )
    {
    if( p_sMenuTitle == LibOctopusCreateDocument.GetNewDocumentString() )
    {
    event.Info.Status.SetHint( "Creates a new CPU/GPU workload document" );
    }
    }
    

    Hint text is the text the user sees when they move the mouse over the menu item. This code checks if the menu name string matches the menu item name string, and sets the menu item hint text accordingly.

  4. Save the script in the text editor.

Test Code Changes

  1. Return to the running Octopus application.
  2. Select Desktop » Refresh Scripts from the main menu.

    The application displays script compiler messages in the output window:

    Start loading scripts
    Done loading scripts; 10 loaded in 1.29 ms; avg 0.09
    

    If there are any script compiler errors, undo your changes in the text editor, go back to the previous step, and follow the instructions again.

  3. Select File » New » Workload from the main menu.

    The command runs but it doesn't appear to do anything. This is normal.

  4. Examine the output window.

    We wrote code that prints the command completion message. As you can see, the message appeared correctly.

    Executed document create command.

    Now that we have verified code execution, it's time to think about what should happen when we create a new file. Scenome applications store their documents in the user's documents folders. For example: C:\Users\Username\MyDocuments\Scenomics\Library\Shader\ShaderProjectName\MyShaderProject.box. We want to do the same thing with Octopus documents, to ensure the user experience is consistent.

    To accomplish this, we'll need to get a project name from the user so we know what directory to create and which file name to use to save their project. We'll assume that directory name and file name will be the same. For example, if the user specifies a project name such as MyComputeWorkload, we will create the following directory and file:

    Table 1.1. New Directory Examples

    Directory Description
    C:\Users\Username\MyDocuments\Scenomics\Library\Octopus\MyComputeWorkload A directory that contains the project file and all other data associated with the project.
    C:\Users\Username\MyDocuments\Scenomics\Library\Octopus\MyComputeWorkload\MyComputeWorkload.box A .BOX file that contains the workload specification.

Modify Function 'Execute' — Implement <PopupControlDialog> Input Wizard

  1. Go to the text editor and find the script app_octopus_create_document_util.ssl.
  2. Find the function named Execute Copy.

    ///////////////////////////////////////////////////////////////////////////////
    // function
    ///////////////////////////////////////////////////////////////////////////////
    
    function bool Execute( CommandExecutionEvent event )
    {
    Console.Out( "Executed document create command." );
    }


    We're going to write the code that actually creates the new document.

  3. Insert the following code immediately above the line Console.Out( "Executed document create command." );.

    Copy Text To Clipboard

    ////////////////////////////////////////
    // Present a wizard so the user can enter project information.
    ////////////////////////////////////////
    
    auto ControlPopupDialog a_oDlg;
    a_oDlg.SetOkButtonEnabled( true );
    
    bool a_bEnabled = true;
    bool a_bReadOnly = false;
    int a_nInitialIndex = -1;
    int a_nInitialValue = 0;
    
    string IDS_PROJECT_NAME = "IDS_PROJECT_NAME";
    
    int IDN_PROJECT_NAME = 0;
    
    LibControlPopupDialog.AddString(
    a_oDlg,
    IDS_PROJECT_NAME,
    a_nInitialIndex,
    "Project Name:",
    "my_project",
    a_bReadOnly,
    a_bEnabled );
    
    if( !( a_oDlg.ShowModal(
    "Create Project", "Specify project options:" ) ) )
    {
    // User cancelled.
    return false;
    }
    

    This code configures and then displays a wizard that allows the user to enter a name for their project. Note that we are only collecting a single value, so the wizard will be pretty easy to use.

  4. Save the script in the text editor.

Modify Function 'Execute' — Implement Input Handling

  1. Go to the text editor and find the script app_octopus_create_document_util.ssl.
  2. Find the function named Execute Copy.
  3. Insert the following code immediately above the line Console.Out( "Executed document create command." ); (which is at the bottom of the function ).

    Copy Text To Clipboard

    ////////////////////////////////////////
    // Process the values entered by the user.
    ////////////////////////////////////////
    
    string a_sProjectName  = a_oDlg.GetStringValue( IDN_PROJECT_NAME );
    
    //Console.Out( a_sProjectName );
    

    This code handles input from the user. It extracts the value the user entered in the dialog and copies the value to a string that we'll use to create the project directory and project document. Note that we are using values like IDN_PROJECT_NAME to avoid using magic numbers.

  4. Save the script in the text editor.

Modify Function 'Execute' — Create The Project Directory

  1. Go to the text editor and find the script app_octopus_create_document_util.ssl.
  2. Find the function named Execute Copy.
  3. Insert the following code immediately above the line Console.Out( "Executed document create command." ); (which is at the bottom of the function ).

    Copy Text To Clipboard

    ////////////////////////////////////////
    // Create the project directory.
    ////////////////////////////////////////
    
    auto FilePath a_oProjectPath = new FilePath(
    LibAppServiceMain.GetLibraryPath() );
    a_oProjectPath.AppendPath( "Octopus" );
    a_oProjectPath.AppendPath( a_sProjectName );
    if( a_oProjectPath.FileExists() )
    {
    // Fail if the directory exists
    // so that we don't overwrite
    // any existing work.
    string a_sMessage = "A project named '" +
    a_sProjectName + "' already exists!";
    LibAppServiceMessageBox.Alert( a_sMessage );
    return false;
    }
    
    bool a_bCreatedDir = Application.CreateDirectory(
    a_oProjectPath.GetPath() );
    if( !( a_bCreatedDir ) )
    {
    // Fail if we can't create the
    // directory since we won't be
    // able to save anything.
    string a_sMessage = "Unable to create directory: " +
    a_oProjectPath.GetPath();
    LibAppServiceMessageBox.Alert( a_sMessage );
    return false;
    }
    

    This code creates the project directory. Notice that there are two guards: the first guard prevents the user from creating a project name if the project already exists, and the second guard informs the user if the application could not create the project directory. In both failure cases, the function informs the user of the failure by presenting a message box, and returns without doing more work.

  4. Save the script in the text editor.

Modify Function 'Execute' — Save The Project To Disk

  1. Go to the text editor and find the script app_octopus_create_document_util.ssl.
  2. Find the function named Execute Copy.
  3. Insert the following function immediately above the line Console.Out( "Executed document create command." ); (which is at the bottom of the function ).

    Copy Text To Clipboard

    ////////////////////////////////////////
    // Save the project to disk.
    ////////////////////////////////////////
    
    string a_sProjectFileName = a_sProjectName + ".box";
    auto FilePath a_oProjectFilePath =
    new FilePath( a_oProjectPath.GetPath() );
    a_oProjectFilePath.AppendPathWithFile(
    a_sProjectFileName );
    
    Model.Class = "v1_octopus";
    Model.DocumentInfo.ShellName = "Octopus_v1.scenomeapp";
    
    Application.SaveFileAs( Model, a_oProjectFilePath.GetPath() );
    
    LibAppServiceShell.SetShellForClass( Model.Class );
    LibAppServiceShell.SetApp( Model );
    

    This code saves the project to disk using the project name specified by the user. With this step complete, we set the shell class, we set the shell itself, and we set the correct app binding. These functions cause the user interface to change from having only three items to having a full main menu and a complete set of context menus. Note that changing the application binding will cause new scripts to load. Since those scripts have to be compiled, there can sometimes be a short delay during document creation.

  4. Save the script in the text editor.

Modify Function 'Execute' — Finalize Changes

  1. Go to the text editor and find the script app_octopus_create_document_util.ssl.
  2. Find the function named Execute Copy.
  3. Insert the following function immediately above the line Console.Out( "Executed document create command." ); (which is at the bottom of the function ).

    Copy Text To Clipboard

    ////////////////////////////////////////
    // Set the name of the root node.
    ////////////////////////////////////////
    
    Model.Name = a_sProjectName;
    

    This code sets the name of the document root node.

  4. Save the script in the text editor.

Test Code Changes

  1. Return to the running Octopus app.
  2. Select Desktop » Refresh Scripts from the main menu. ( ALT + D + R )

    The application displays script compiler messages in the output window:

    Start loading scripts
    Done loading scripts; 10 loaded in 1.29 ms; avg 0.09
    

    If there are any script compiler errors, undo your changes in the text editor, go back to the previous step, and follow the instructions again. Here is an example of what error messages might look like:

    Start loading scripts
    D:\release6\scripts\app_shell_util.ssl(1770) : error: newline in constant
    Done loading scripts; 10 loaded in 1.29 ms; avg 0.09
    
  3. Select File » New » Workload from the main menu.

    The Create Workload wizard appears:

    This is a picture of the new Create Workload wizard.
  4. Set the value of Project Name to the following:

    Copy Text To Clipboard

    Western-Washington-Mt-Baker-Terrain-Analysis
  5. Click OK or hit ENTER when you are finished.

    The document create code executes and creates your new project. There might be a short delay while scripts are compiled when the user interface is reloaded.

    This is a picture of the new project document.
  6. Select File » Save from the main menu.
  7. Select File » Exit to shut down the Octopus app and proceed to the next exercise.