Create Edge Detection Shader For Raspberry Pi 4

You need the following Simdify® modules to complete all exercises involving the Raspberry Pi 4: Simdify® Free Edition, Simdify® Video Module, Simdify® Raspberry Pi 4 Export Module

This exercise teaches you how to create a new Simdify Shader document, implement a GLSL shader module that performs edge detection, and then visualize the results with a fragment shader. Your GPU must support GLSL #version 300 in order to complete this exercise. This section assumes you have completed the previous exercise and that you know the RTSP address of the video stream for your Raspberry Pi 4 video camera.

Start The Layout application

  1. Start the Layout app. (Start » Programs » Scenomics » Layout) or (Windows® key and then type 'Layout' to find the app icon.)

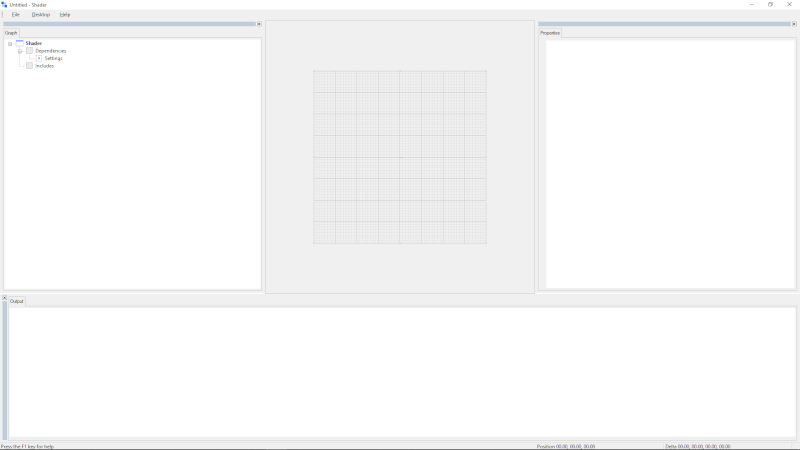
    The application displays a splash screen and then the application desktop appears. The main menu is composed of three items: File, Desktop, and Help. These options provide access to commands relevant to the current context (which is an empty file). The application desktop changes when you create a new file or load a file from disk.

    This is a picture of the desktop.

Create A New Document

  1. Select File » New » Shader from the main menu.

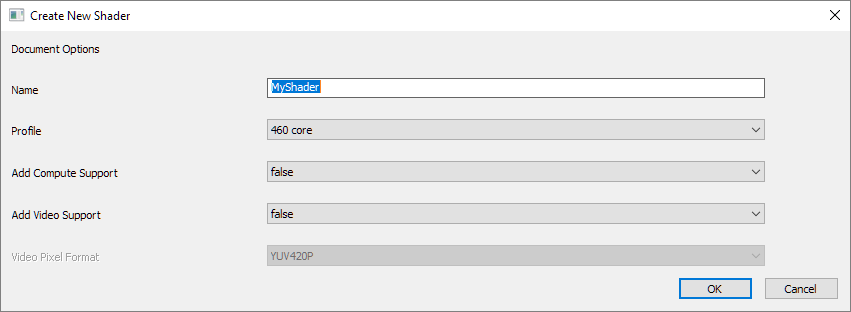
    The software displays a wizard that allows you to specify the parameters of your new shader.

    This is a picture of the new project dialog.
  2. Type User Edge Detection in the field named Name.

    Copy Text To Clipboard

    User Edge Detection

    When the document is saved, the file name will be User Edge Detection.box.

  3. Select 300 es in the field named Profile.
  4. Set Add Video Support to true.

    We won't set a value for Video Pixel Format. Leave it set to its current value.

  5. Hit ENTER or click OK when you are finished.

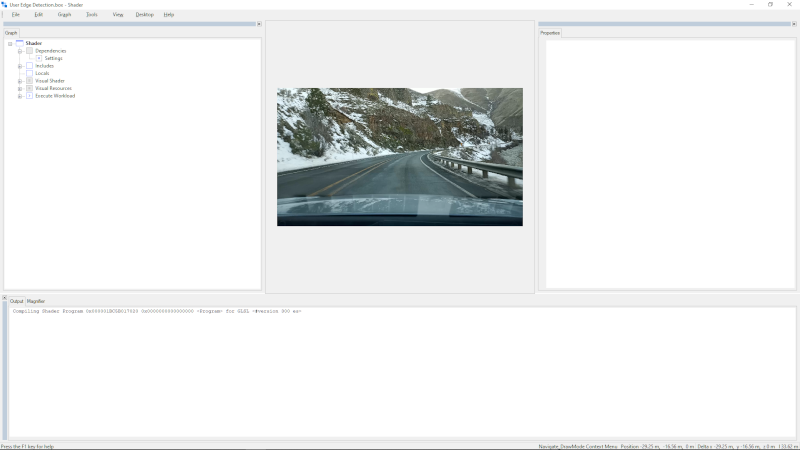
    The application creates a new shader document and the main menu options change. In the main application window you can see the hierarchy on the left, the rendered shader with geometry in the middle, and the property sheet on the right.

    This is a picture of the workspace.

    If the shader compiled successfully, you should see a road in a canyon in the center of the worksheet.

  6. Select File » Save from the main menu.

    For future reference, the location where this file is saved can be obtained using File » Open Containing Folder, when nothing is selected.

Examine The New Document

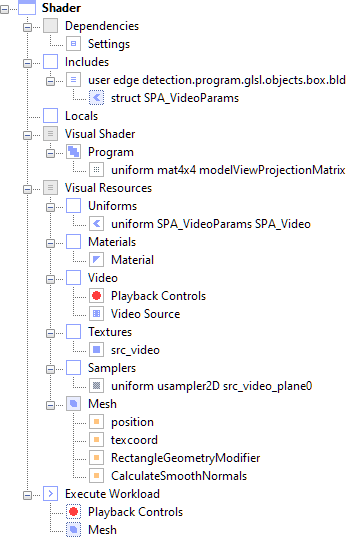
  1. Examine the main menu and select Graph » State » Expand All Tree Items. ( Or hit ALT + X ).

    This expands the graph so that you can see all the nodes.

    NOTE: You can hover over each node icon, in the image below, for a description of the node and its function.

    That covers the basic information about the graph.

Examine The <Program>

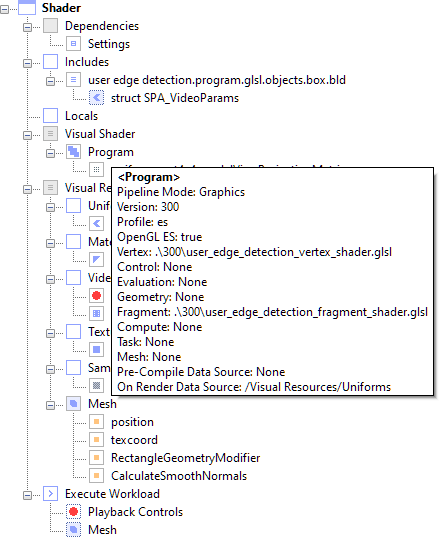
  1. In the running Layout app, move the cursor over the <Program> node named Program.

    Notice that you can see the GLSL version, profile, and source code locations. Many nodes, but not all of them, display useful information if you hover over them. We can see that the shader uses GLSL #version 300 es as we requested when we created the document.

    This is a picture of the Program node info tip.

Connect To Raspberry Pi Video

  1. Find the RTSP address from the previous exercise (Start Raspberry Pi 4 Video Feed).

    For example: rtsp://192.168.1.30:8554/video

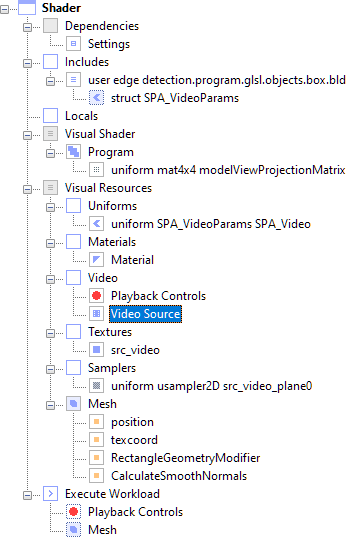
  2. Examine the hierarchy and find the <VideoTextureBridge> node named Video Source. This is a picture of the hierarchy showing the VideoTextureBridge node.
  3. Right click over the <VideoTextureBridge> node named Video Source and select Edit... from the listed options.

    The software displays a dialog that allows you to edit the node's properties.

    This is a picture of the VideoTextureBridge node edit dialog.
  4. Set the Video Source Path/URL to your the RTSP address of your Raspberry Pi 4 video stream, such as: rtsp://192.168.1.30:8554/video.

    Note that you can set Video Source Path/URL to RTSP video streams or files on disk. In this case we are setting this path to an RTSP video stream. And for this exercise, this video stream is originating from your Raspberry Pi 4.

  5. Click OK or hit ENTER when you are finished.

    You won't see a change immediately. You still need to play the video.

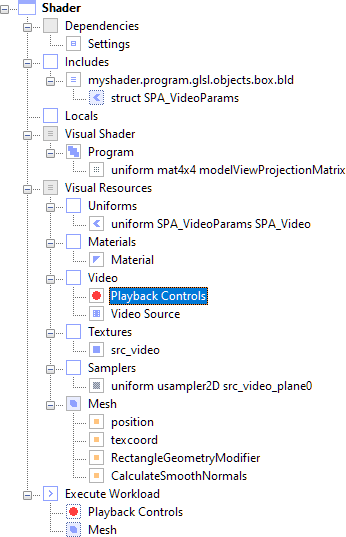
  6. Examine the hierarchy and find the <VideoSourceNode> named Playback Controls. This is a picture of the hierarchy.
  7. Right click over the <VideoSourceNode> named Playback Controls and select Play/Pause from the listed options.

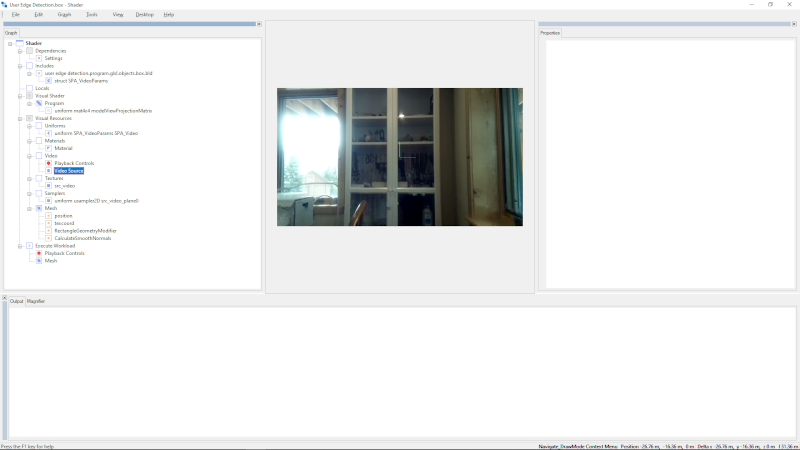
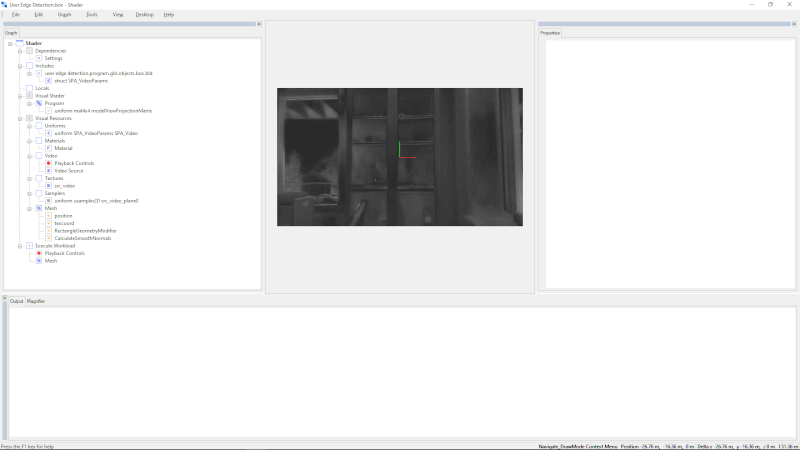
    Playback will start in a few seconds and you'll see the output from your Raspberry Pi 4 video camera on the geometry in the Layout application. Your video won't match the screenshot below, but you will see video playing. If your Raspberry Pi 4 video does not appear in the Layout app, please verify again that you can see the video stream using VLC.

    This is a picture of video from the Raspberry Pi video camera being rendered in the Layout application.
  8. Again, right click over the <VideoSourceNode> named Playback Controls and select Stop from the listed options.

    The video playback stops. Now we'll write a shader!

Create Edge Detection Module On Disk

  1. Examine the main menu and select File » New Shader Include....

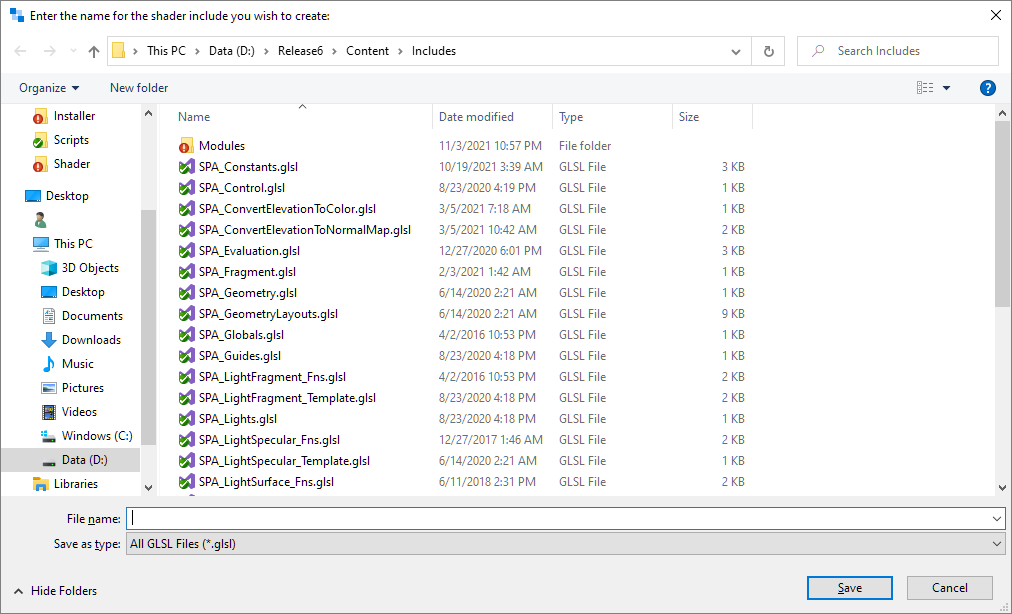
    The application displays a dialog that allows you to create a new include file.

    This is a picture of the file save dialog.
  2. Examine the dialog and find the folder named Modules.
  3. Double click to enter the folder.
  4. Type SPA_UserSobelEdges.glsl and hit ENTER or click Save when you are finished.

    Copy Text To Clipboard

    SPA_UserSobelEdges.glsl

    The software saves the file to disk and copies the file path to the Windows® clipboard. This means we can use CTRL + V to paste this into a file open dialog and open the file without searching.

Implement Edge Detection Module

  1. Start a text editor (such as Notepad++ or Microsoft Visual Studio®) and select the option to open a file from disk.
  2. Hit CTRL + V to paste the file path into the file path text field and open the file.

    The file SPA_UserSobelEdges.glsl opens and you'll notice that it's empty.

  3. Copy the following shader code into the empty SPA_UserSobelEdges.glsl.

    Copy Text To Clipboard

    #ifndef SPA_USER_SOBEL_EDGES
    #define SPA_USER_SOBEL_EDGES
    
    const int KERNEL_SIZE = 9;
    
    float u_kernel[KERNEL_SIZE] = float[KERNEL_SIZE](
    
    -1.0, -2.0, -1.0,
    0.0,  0.0,  0.0,
    1.0,  2.0,  1.0
    );
    
    #define SAMPLE_PIXEL( _x, _y ) ( SPA_VideoSamplePixel( image, luma_coord + ivec2( _x , _y ), u_coord, v_coord ) )
    
    // Include load/store functionality for specific sampler/image types.
    #if SPA_GL_VENDOR != SPA_GL_INTEL && __VERSION__ >= 330
    vec4 SPA_Sobel( layout( r8ui ) uimage2D image, vec2 coords )
    #else
    vec4 SPA_Sobel( usampler2D image, vec2 coords )
    #endif
    {
    mat3 I;
    float cnv[9];
    ivec2 luma_coord;
    ivec2 u_coord;
    ivec2 v_coord;
    uvec3 src_color;
    
    SPA_VideoGetYuvCoords( image, coords, luma_coord, u_coord, v_coord );
    
    float dx = ( length( vec3( SAMPLE_PIXEL( -1, -1 ) ) / 255.0 * u_kernel[0] +
                vec3( SAMPLE_PIXEL( -1,  0 ) ) / 255.0 * u_kernel[1] +
                vec3( SAMPLE_PIXEL( -1, +1 ) ) / 255.0 * u_kernel[2]) -
          length( vec3( SAMPLE_PIXEL( +1, -1 ) ) / 255.0 * u_kernel[0] +
                vec3( SAMPLE_PIXEL( +1,  0 ) ) / 255.0 * u_kernel[1] +
                vec3( SAMPLE_PIXEL( +1, +1 ) ) / 255.0 * u_kernel[2] ) );
    
    float dy = ( length( vec3( SAMPLE_PIXEL( -1, -1 ) ) / 255.0 * u_kernel[0] +
                vec3( SAMPLE_PIXEL(  0, -1 ) ) / 255.0 * u_kernel[1] +
                vec3( SAMPLE_PIXEL( +1, -1 ) ) / 255.0 * u_kernel[2]) -
          length( vec3( SAMPLE_PIXEL( -1, +1 ) ) / 255.0 * u_kernel[0] +
                vec3( SAMPLE_PIXEL(  0, +1 ) ) / 255.0 * u_kernel[1] +
                vec3( SAMPLE_PIXEL( +1, +1 ) ) / 255.0 * u_kernel[2] ) );
    
    float val = length( vec2( dx, dy ) );
    
    return vec4( val, val, val, 1.0 );
    }
    
    // !SPA_USER_SOBEL_EDGES
    #endif
    

    This is a fairly basic filter, but it will work very well for this example.
  4. Save the file in the text edtor.

Copy Fragment Shader Path

  1. Return to the running Layout application and examine the hierarchy.
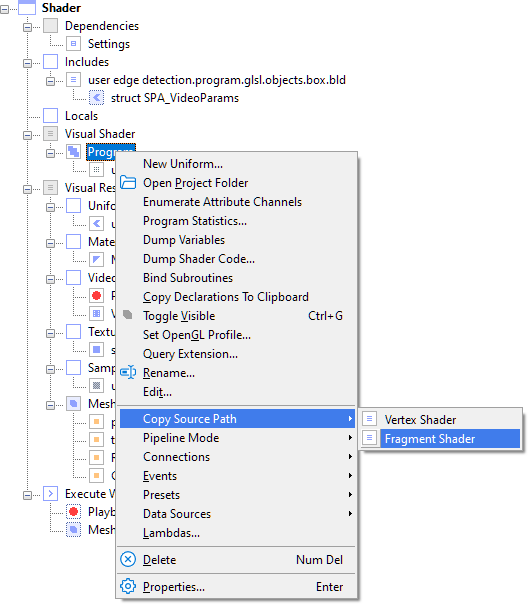
  2. Right click over the <Program> node named Program and select Copy Source Path » Fragment Shader from the listed options. This is a picture of the hierarchy.

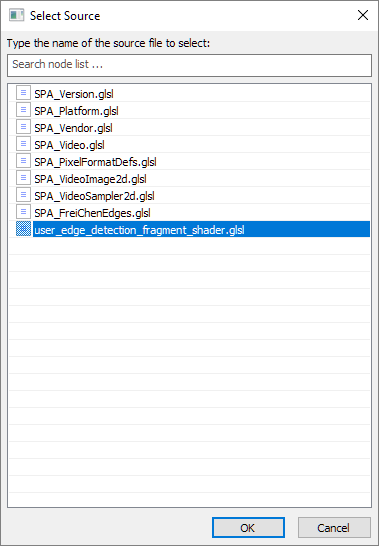
    This displays a dialog that allows you to select GLSL shader source code (and any include files). The file path of the source item you select will be copied to the Windows® clipboard so you can open it in a text editor. Select user_edge_detection_fragment_shader.glsl and click OK

    This is a picture of the source code used by the <Program> node fragment shader.

Modify Fragment Shader

  1. Return to your text editor and choose the File » Open command.
  2. Hit CTRL + V to paste the file path into the file path text field and open the file.

    The file user_edge_detection_fragment_shader.glsl opens. Your fragment shader looks like this.

    // #version 300
    // The version number is automatically injected by the application.
    // It is included above for reference purposes only.
    #include <SPA_Version.glsl>
    
    precision highp int;
    precision highp float;
    precision highp usampler2D;
    
    #include <SPA_Constants.glsl>
    #include <SPA_Video.glsl>
    
    in vec2 fs_texcoord;
    
    uniform usampler2D src_video_plane0;
    
    out vec4 fragColor;
    
    void main(void)
    {
    ivec2 luma_coord;
    ivec2 u_coord;
    ivec2 v_coord;
    ivec2 video_dimension;
    
    video_dimension = SPA_VideoSizeYuvFormat( src_video_plane0 );
    
    SPA_VideoGetYuvCoords( src_video_plane0, fs_texcoord, luma_coord, u_coord, v_coord );
    uvec3 yuv = SPA_VideoSamplePixel( src_video_plane0, luma_coord, u_coord, v_coord );
    
    vec3 rgb = SPA_YUVToRGB( yuv );
    fragColor = vec4( rgb.r, rgb.g, rgb.b, 1.0 );
    }
    
  3. Replace the contents of the fragment shader with the following shader code:

    Copy Text To Clipboard

    // #version 300
    // The version number is automatically injected by the application.
    // It is included above for reference purposes only.
    #include <SPA_Version.glsl>
    
    precision highp int;
    precision highp float;
    precision highp usampler2D;
    
    #include <SPA_Constants.glsl>
    #include <SPA_Video.glsl>
    #include <Modules\SPA_UserSobelEdges.glsl>
    
    in vec2 fs_texcoord;
    
    uniform usampler2D src_video_plane0;
    
    out vec4 fragColor;
    
    void main(void)
    {
    ivec2 luma_coord;
    ivec2 u_coord;
    ivec2 v_coord;
    ivec2 video_dimension;
    
    video_dimension = SPA_VideoSizeYuvFormat( src_video_plane0 );
    
    SPA_VideoGetYuvCoords( src_video_plane0, fs_texcoord, luma_coord, u_coord, v_coord );
    uvec3 yuv = SPA_VideoSamplePixel( src_video_plane0, luma_coord, u_coord, v_coord );
    
    vec3 rgb = SPA_YUVToRGB( yuv );
    fragColor = SPA_Sobel( src_video_plane0, fs_texcoord );
    }
    

    Note that the shader imports the GLSL module we just implemented:

    #include <Modules\SPA_UserSobelEdges.glsl>
    

    We've also replaced the assignment to fragColor with a call to SPA_Sobel( ... ).

    fragColor = SPA_Sobel( src_video_plane0, fs_texcoord );
    
  4. Save the shader source code in the text editor.

    Now we need to verify that the edge detection shader works.

Verify Edge Detection Shader

  1. Examine the hierarchy.
  2. Right click over the VideoControlNode named Playback Controls and select Play/Pause from the listed options.

    Playback will start in a few seconds and you'll see the output from your Raspberry Pi 4 video camera showing the results of the Sobel edge detection on the video, instead of the raw video you saw before.

    This is a picture of video from the Raspberry Pi video camera being modified by the edge detection shader.

    If you don't see video with edge detection, please contact support@scenomics.com for assistance.

  3. Again, right click over the VideoSourceNode named Playback Controls and select Play/Pause from the listed options.

    The video playback pauses.

  4. Select File » Save from the main menu.

    This exercise is complete. Return to tutorials or proceed to the next exercise in this series.